Certifications
Ensuring that our products comply with regulations and standards is necessary to demonstrate Ecoceramic's quality and commitment to its customers.

Quality and environmental politics

ISO 14021

Floor Score

UPEC

Global EPD
ISO 9001 ISO 14001

CE

UKCA

LEED
Tips
Ensuring that our products comply with regulations and standards is necessary to demonstrate Ecoceramic's quality and commitment to its customers.
For the installation of large format ceramic materials it is necessary to take into account some details before installation:
– Make sure that the surface on which you are going to install the material is prepared: properly levelled.
– Have help if necessary.
– Plan the pieces to make efficient use of the material.
– Choose suitable, high quality adhesive and grouting materials.
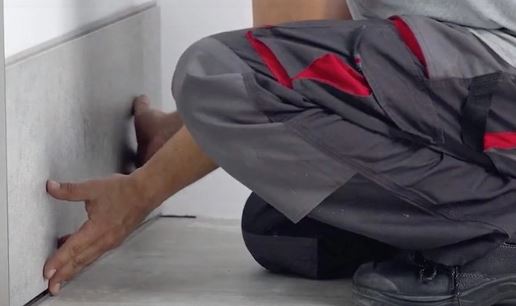
– Use a levelling system with crosspieces for a correct installation and an optimal final result.
– Respect the minimum recommended joints.
– Remove and clean excess material.
– Respect the drying time.
– Laying of levelling crosspieces
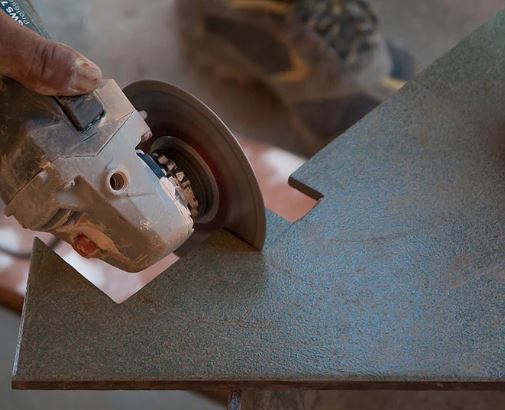
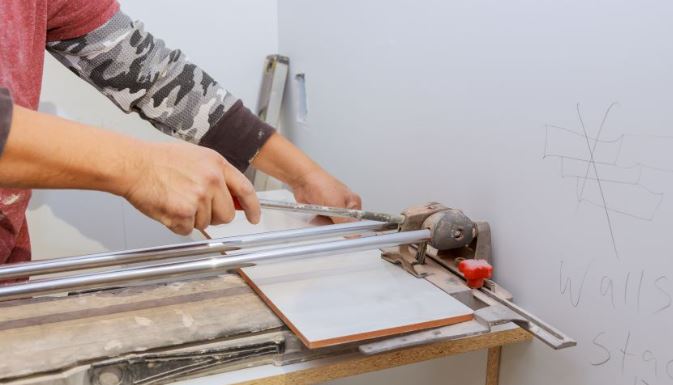
Adjusting the pieces to fit into place can be a problem during installation. Porcelain tile is a very resistant material and it can be a problem when cutting the pieces. In the following video you will find how to cut the pieces of porcelain tile and 20mm.
The minimum product spacing should not be less than 2-3 mm for indoor and 3-5 mm for outdoor use.
| Movement joints | Structural joints | Perimeter joints | Partition joints | Separation joints |
|---|---|---|---|---|
| For a correct installation of the ceramic product, it is necessary to always respect the movement joints: structural, perimeter, expansion and tile-to-tile joints. | They must always be respected as detailed in the project, fixed by the specialised engineer or architect. | They must be continuous and their width must not be less than 8 mm. Their purpose is to isolate the ceramic flooring from other clad surfaces such as wall-floor junctions (they are concealed by the skirting board), pillars, doors. Omitting the perimeter joints is one of the most frequent causes of ceramic tile lifting. |
They will allow for the existing deformations caused by thermal variations between the tiles, the layer and the substrate. Large support surfaces covered with ceramic tiles should be subdivided into smaller ones, delimited by partition joints, whose function is to prevent the accumulation of expansion and contraction. For floors that will be subject to heavy foot traffic, heavy wheeled traffic or heavy loads, it is necessary to use specific partition joints suitable for heavy loads. | For safety in any structural movement (expansion – contraction), it is always necessary to place the separation joint, which should be left between all adjacent ceramic tiles. It is recommended not to install the tiles with a gap of less than 2/3 mm. The advantages of placement joints are numerous; they help absorb deformations caused by the substrate and moderate the stresses generated on the underside when subjected to load. Accumulated stresses can cause the tiles to lift. They also play an important aesthetic role, enhancing the inherent beauty of the ceramics. The joints can have a flat finish, flush with the tiles, or a concave recessed finish. Their field of application includes interior and exterior cladding.
There are also low-porosity, deformable, and water-repellent joint sealants available. These are suitable for façades, floors subjected to heavy traffic, and areas with persistent water presence. For areas frequently exposed to acids and alkalis, such as food or healthcare environments, sealants based on reactive resins, such as epoxy sealers, should be used. This type of grout material is characterised by its composition of synthetic resins (typically epoxy resin). Its main properties include: resistance to chemicals, bacterial resistance, excellent resistance to moisture, and exceptional resistance to abrasion. The manufacturer’s instructions for adhesives should always be followed. |
Due to the low porosity of porcelain stoneware, the possibility of it becoming stained is virtually nonexistent.
However, some strongly pigmented products may spill or come into accidental contact with the surface of the material; polished and semi-polished porcelain, if this substance is left on the surface for some time, can stain. Therefore, it is advised to clean it as soon as possible.
Once the installation and grouting operations are completed, the surface of the ceramic material may show remnants of cement in the form of a film or small accumulations. To remove these residues, in most cases, cleaning with a diluted acidic solution is sufficient.
As a general rule, the following precautions should always be taken into account:
- Do not use products containing carbon black/micronized carbon (grout).
- Do not use products containing hydrofluoric acid.
- Do not use products containing waxes, soaps, or polishers.
- For everyday cleaning, use pH-neutral cleaners.
Always follow the manufacturer’s instructions.
- Metal spatulas or abrasive sponges should not be used.
- After installation, the flooring should be adequately protected using materials such as cardboard, sawdust, or another product to shield it from potential damage caused by subsequent work.
To avoid breakage and any unwanted cutting finishes, it is advisable to use the correct tools for cutting and drilling porcelain stoneware.
For straight cuts, use a manual cutting machine with a carbide wheel, or a water-cooled diamond disc machine, and/or a low-power angle grinder fitted with a continuous diamond disc (non-segmented).
For drilling porcelain stoneware, use a diamond drill bit and periodically cool the drilling area with water to prevent increasing the temperature and melting the drill bit.
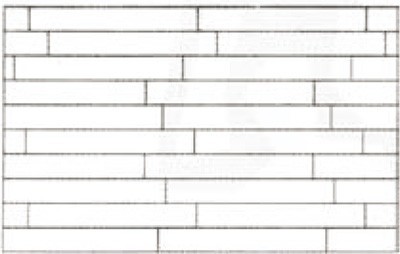
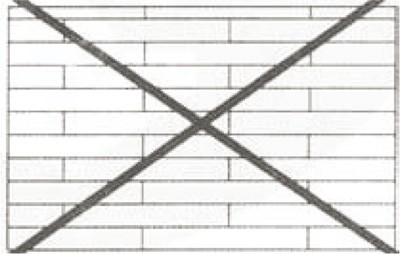
The flooring should not be installed with a staggered arrangement where its displacement exceeds 14 cm.
|
|
|
|
|---|---|---|
 |
 |
Videos

Cleaning Grease form Ceramic Tile
Recovering Polished Flooring

How to Clean Ceramic Tile with Stain Remover

